Apache Spark Cluster with Kubernetes and Docker - Part 1
Dec 9, 2015 00:00 · 777 words · 4 minutes read
If you’re into Data Science and Analytics, you’ve probably heard of Apache Spark. I’ve been playing with this framework on and off for a while and completed two very interesting MOOCs on Spark; recently I decided
First things first
Click this link and follow the instructions in the section “Before you begin”: Create a google account, enable billing1, install the gcloud command line interface (CLI) and install docker locally. kubectl should also be installed:
gcloud components update kubectlAs a second step, create a new project in the Google Developers Console, give it an appropriate name (e.g. project-spark-k8s),
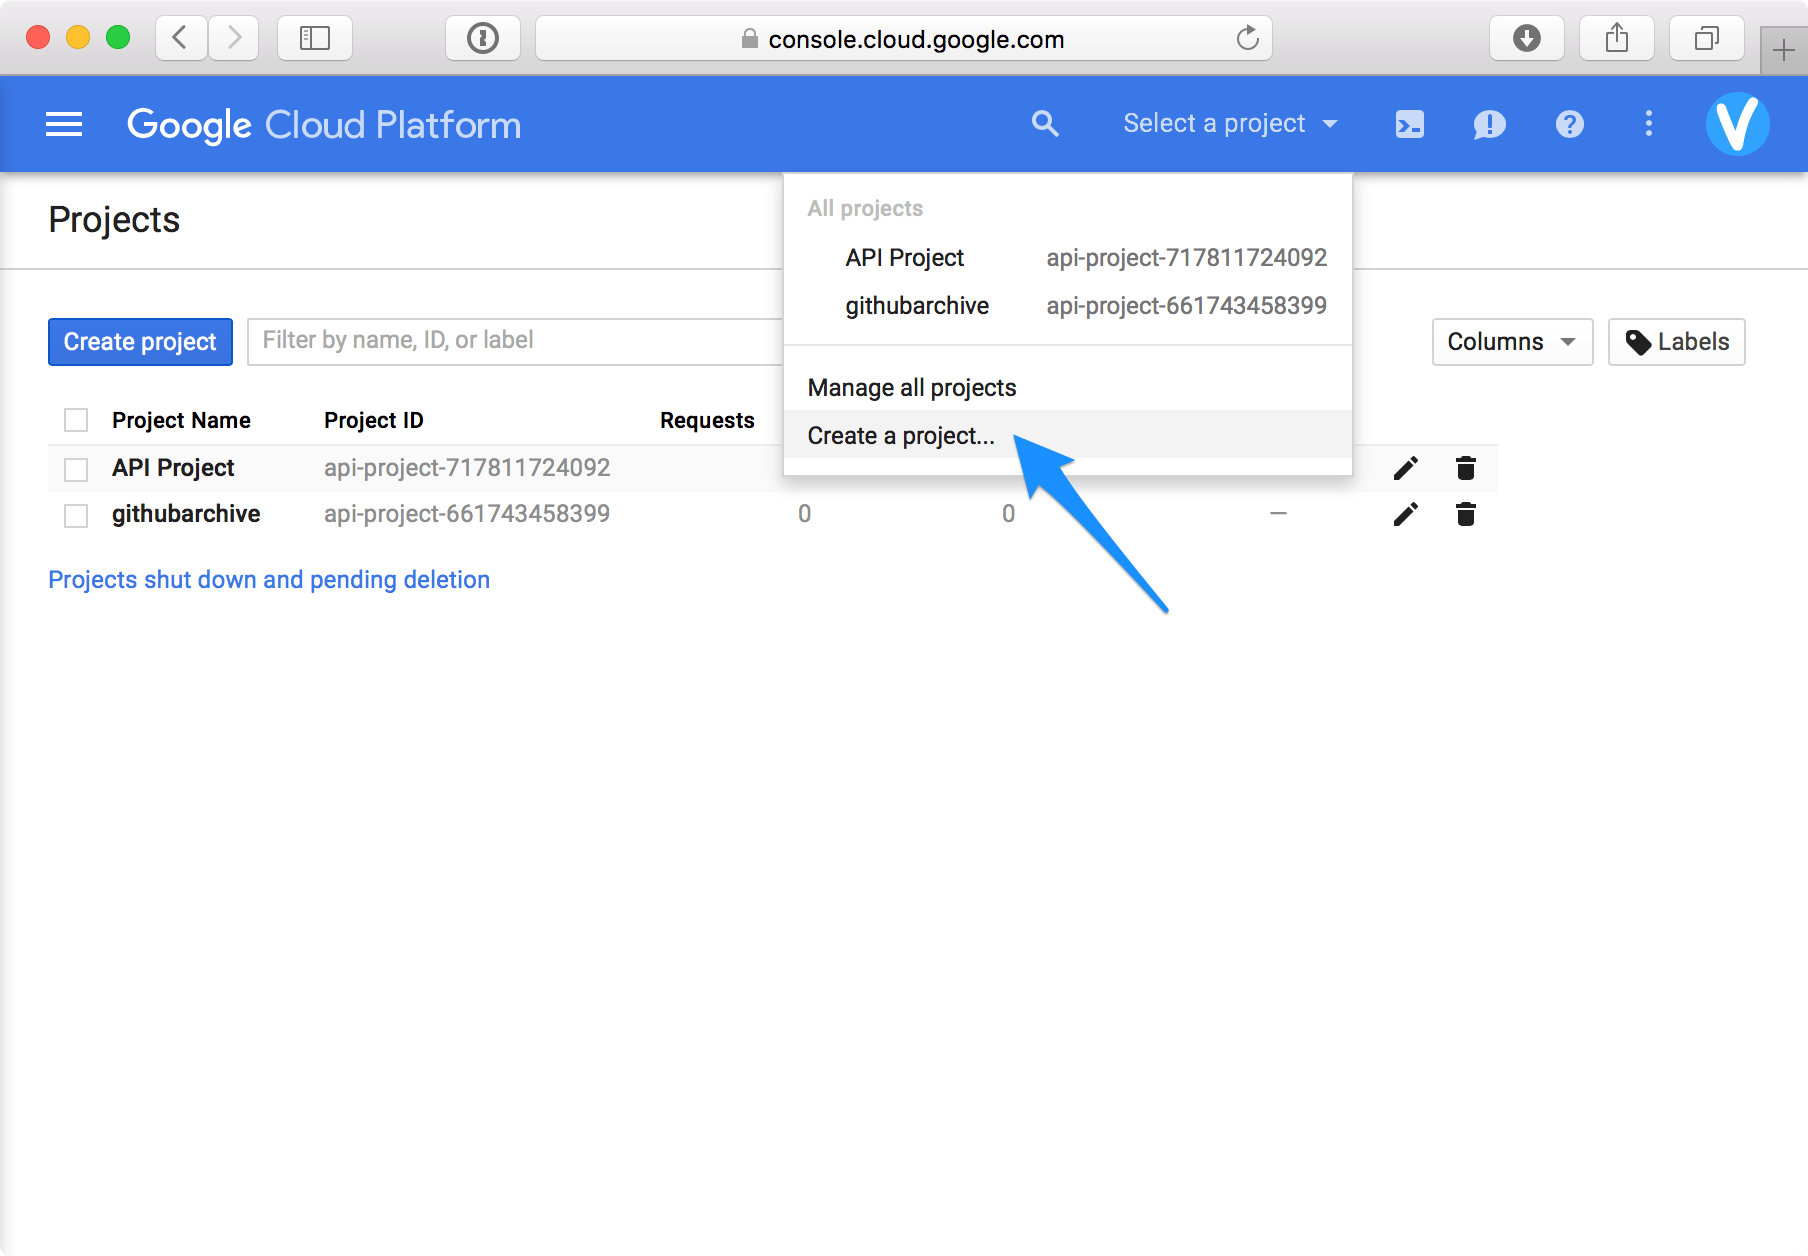
if necessary, assign a unique ProjectID2

and set this project as default using the CLI:
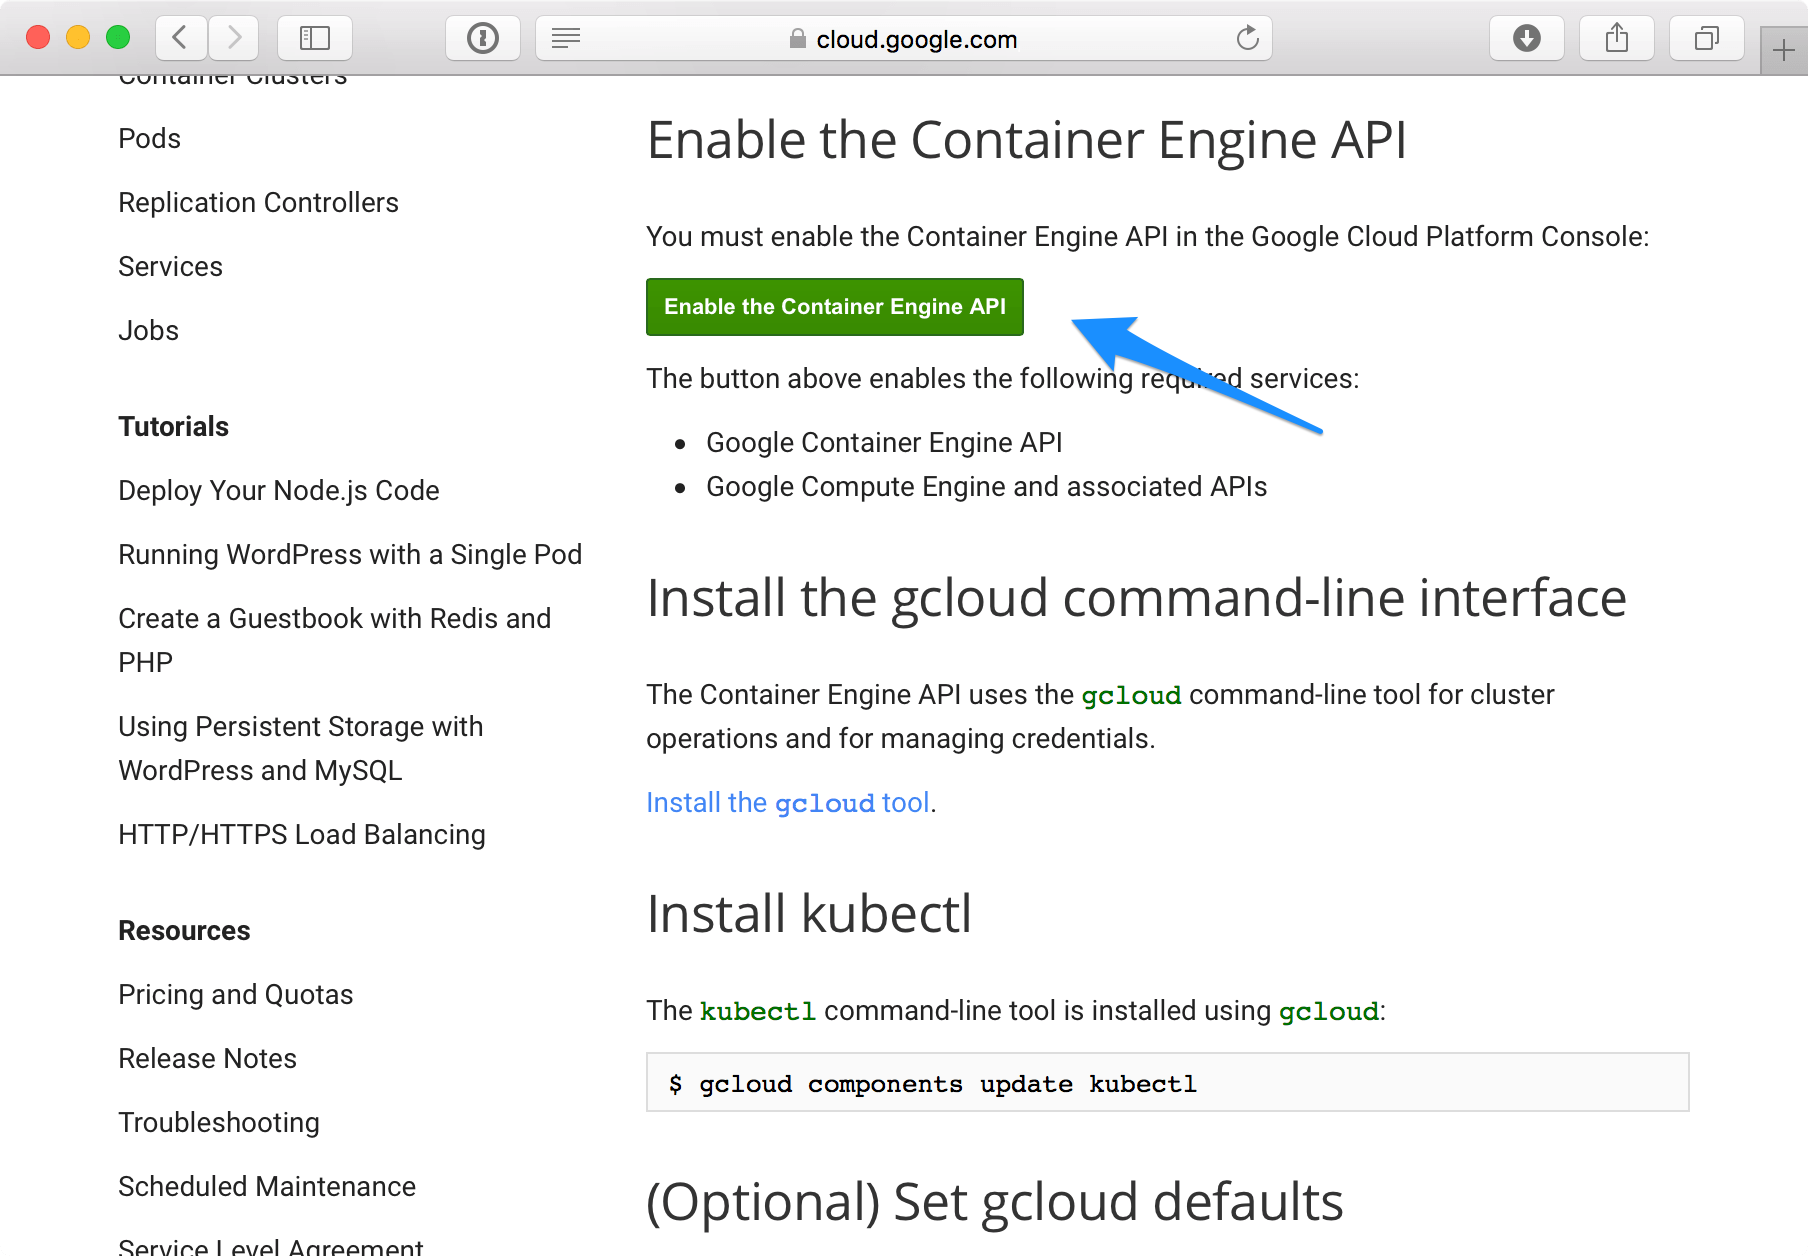
gcloud config set project "project-spark-k8s-vv2"Then go again to the Before you begin link and enable the Google Container and Google Compute Engine APIs:
Finally create a local folder where you’ll work:
mkdir -p KubernetesSpark/examples/sparkand download the following files in it:
cd KubernetesSpark/examples/spark
curl -O https://raw.githubusercontent.com/kubernetes/kubernetes/v1.2.0-alpha.5/examples/spark/spark-master-controller.yaml
curl -O https://raw.githubusercontent.com/kubernetes/kubernetes/v1.2.0-alpha.5/examples/spark/spark-master-controller.yaml
curl -O https://raw.githubusercontent.com/kubernetes/kubernetes/v1.2.0-alpha.5/examples/spark/spark-master-service.yaml
curl -O https://raw.githubusercontent.com/kubernetes/kubernetes/v1.2.0-alpha.5/examples/spark/spark-webui.yaml
curl -O https://raw.githubusercontent.com/kubernetes/kubernetes/v1.2.0-alpha.5/examples/spark/spark-worker-controller.yaml
curl -O https://raw.githubusercontent.com/kubernetes/kubernetes/v1.2.0-alpha.5/examples/spark/zeppelin-controller.yaml
curl -O https://raw.githubusercontent.com/kubernetes/kubernetes/v1.2.0-alpha.5/examples/spark/zeppelin-service.yaml
Create a cluster
To create a cluster run the following command:
gcloud container --project "project-spark-k8s" clusters create spark-cluster --num-nodes 4 --zone europe-west1-c --machine-type n1-standard-1 --scope "https://www.googleapis.com/auth/compute"As you can see, the cluster created, named “spark-cluster”, consists of four n1-standard-1 nodes. To get more information about it, type: To check the names of the four instances and get basic information about them (e.g. internal IP, external IP, etc), type:
gcloud compute instances listStart Master Service
NOTE: This documentation is heavily based on https://github.com/kubernetes/kubernetes/tree/master/examples/spark.
First create a replication controller running the Spark Master service:
kubectl create -f examples/spark/spark-master-controller.yamlTo find out details about the replication controller, first find its exact name:
kubectl get podsNAME READY STATUS RESTARTS AGE
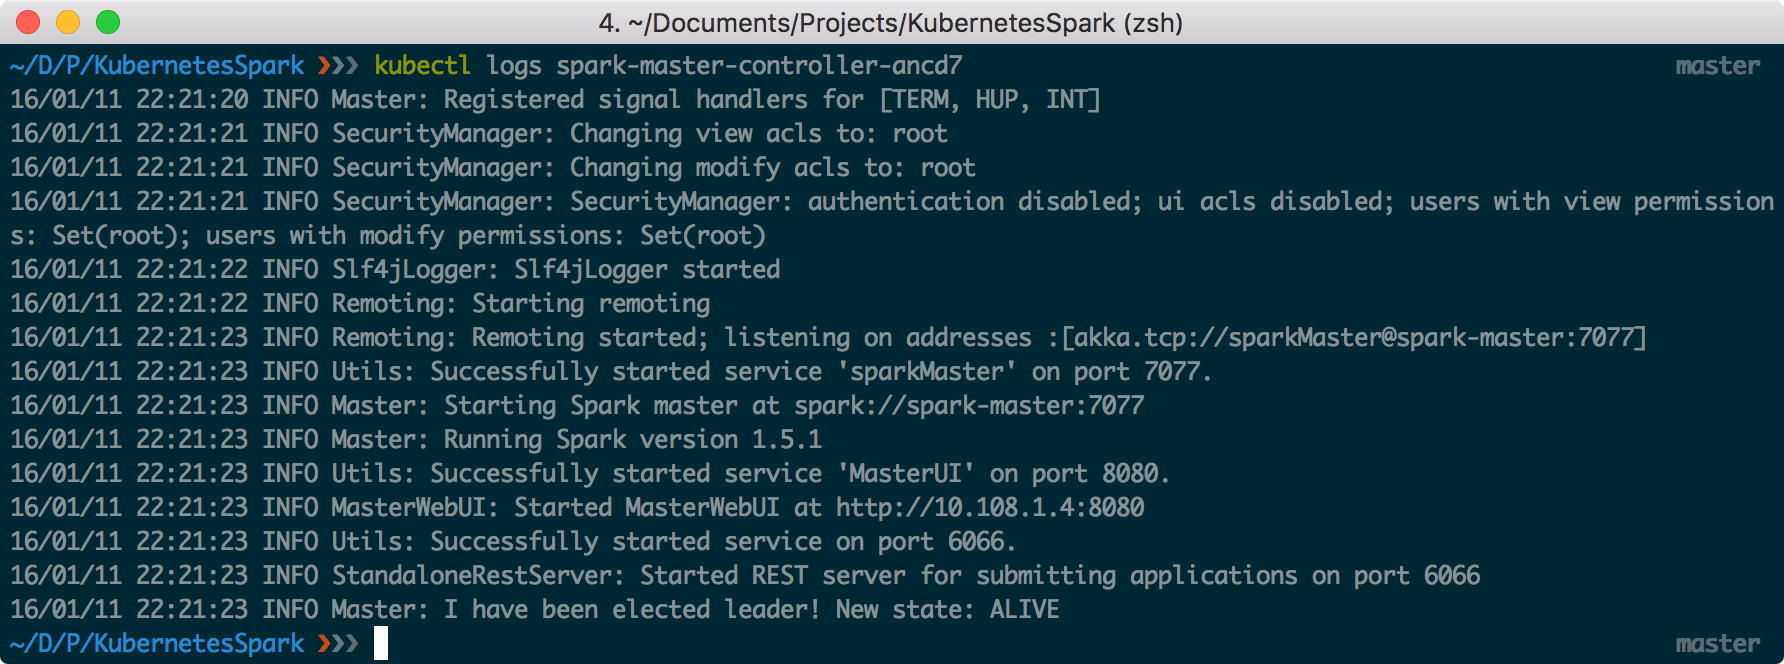
spark-master-controller-xyz12 1/1 Running 0 1hkubectl describe pods spark-master-controller-xyz12kubectl logs spark-master-controller-xyz12Here a sample of the log output:
As a second step after the creation of the replication controller, create a logical service endpoint that Spark workers can use to access the Master pod:
kubectl create -f examples/spark/spark-master-service.yamlkubectl create -f examples/spark/spark-webui.yamlkubectl get services
For more detailed information about each service, run the corresponding describe command, e.g.
kubectl describe service spark-masterkubectl proxy --port=8001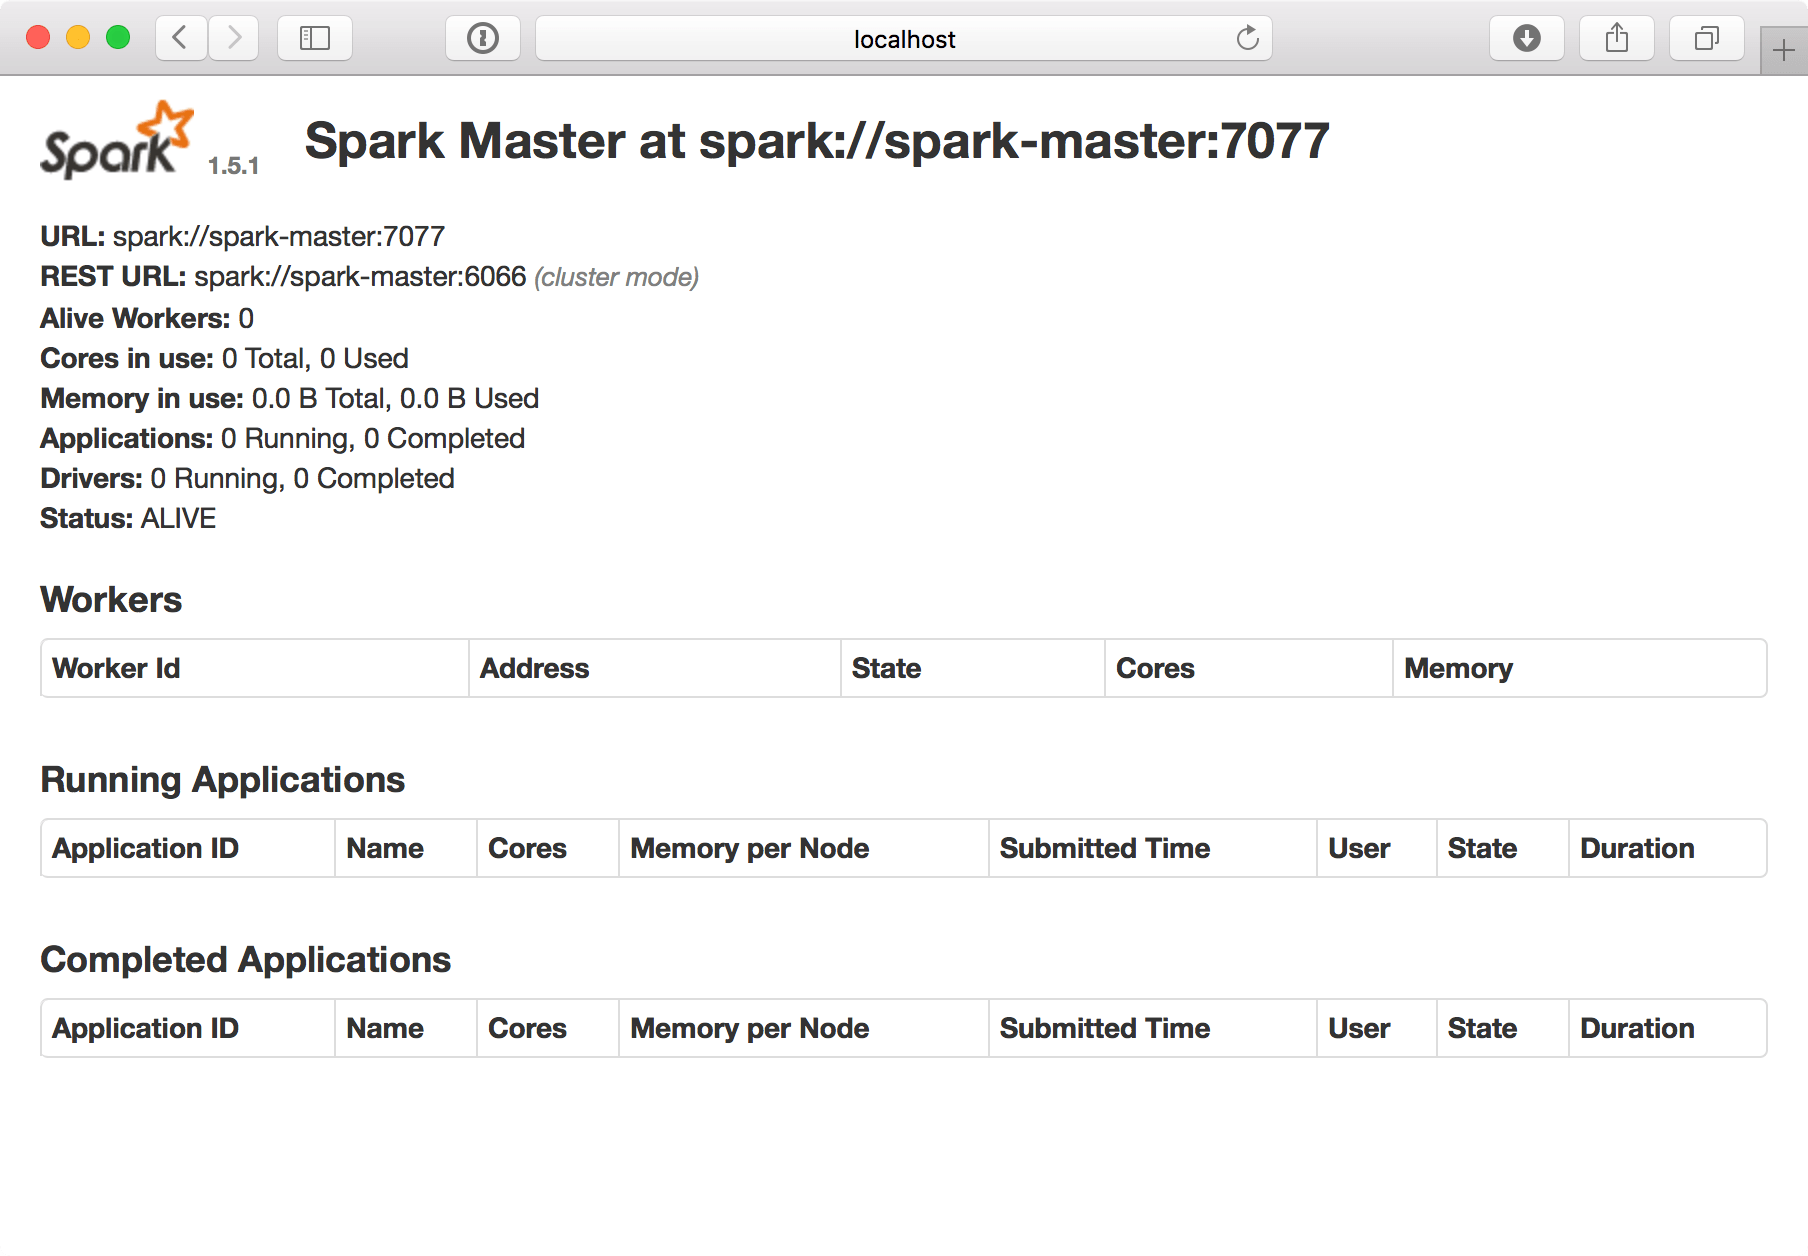
To make sure the command line is accessible press Ctrl-Z and then type bg. This way the process can run in the background, while other commands can be run in the foreground.
Start the Spark Workers
NOTE: The Spark workers need the Master service to be running.
First create a replication controller that manages the worker pods:
kubectl create -f examples/spark/spark-worker-controller.yamlkubectl get podskubectl logs spark-master-controller-xyz12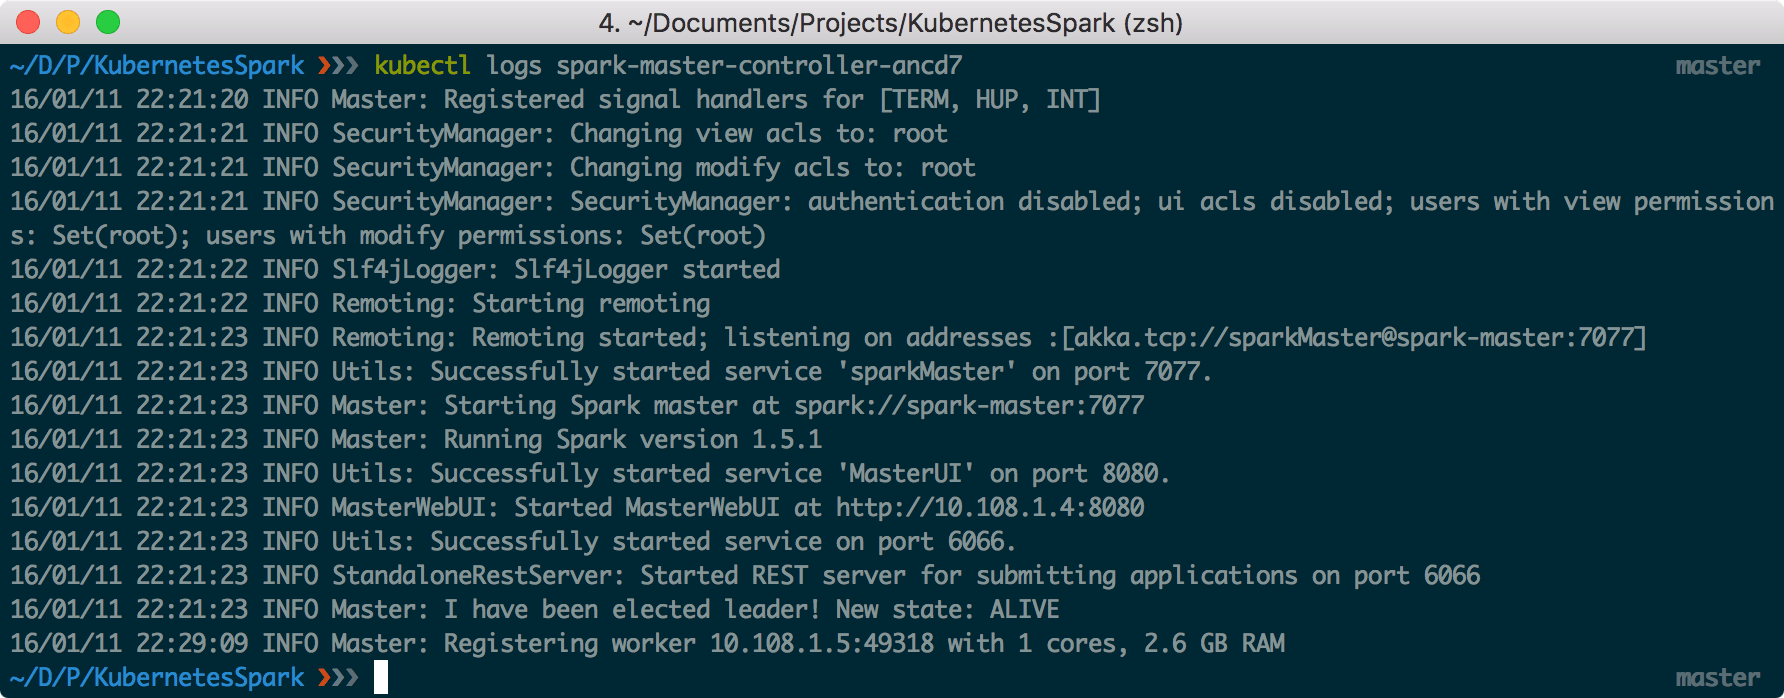
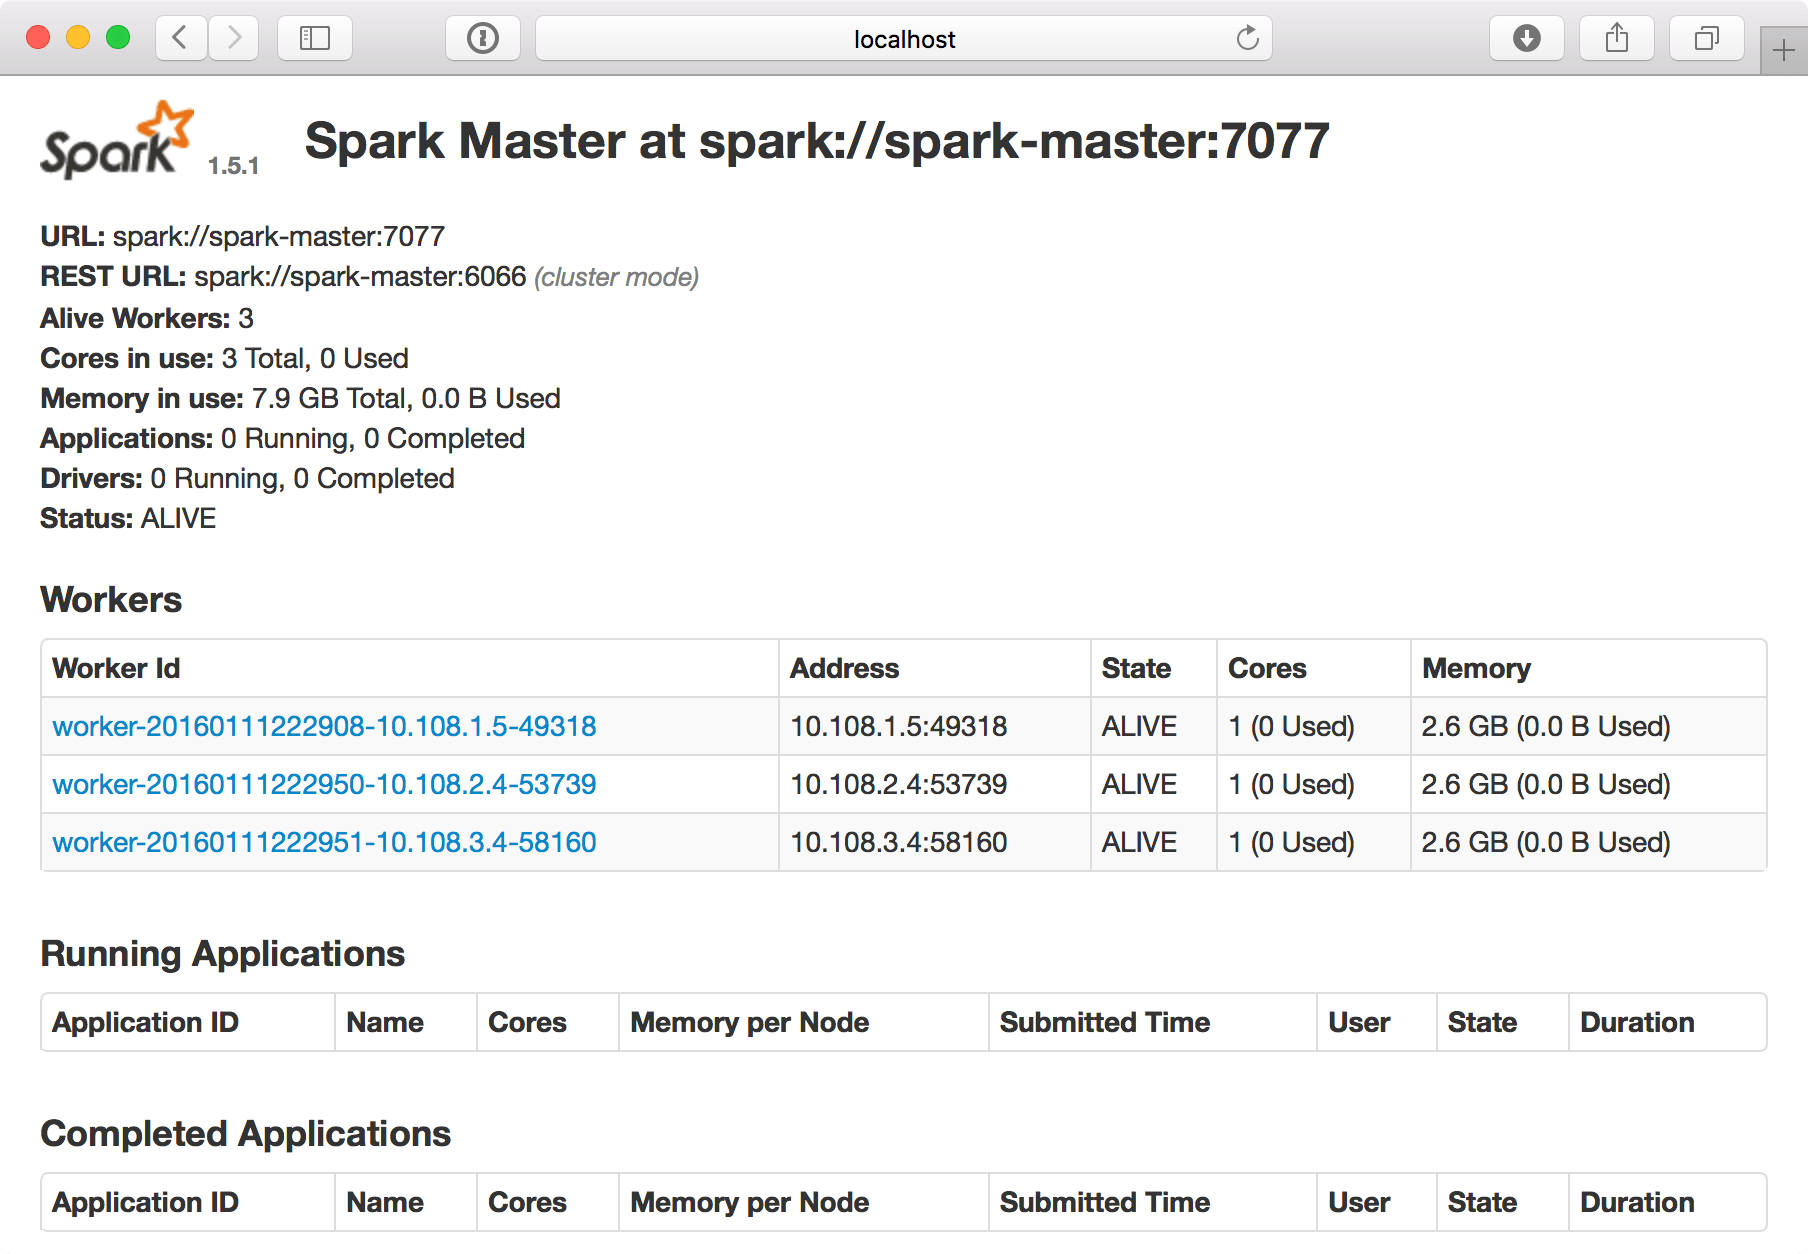
The WebUI now looks like that:
Start the Zeppelin UI
The Zeppelin UI pod will be used to launch jobs into the Spark cluster. To start it, run:
kubectl create -f examples/spark/zeppelin-controller.yamlkubectl get pods -lcomponent=zeppelinkubectl port-forward zeppelin-controller-xyz12 8080:8080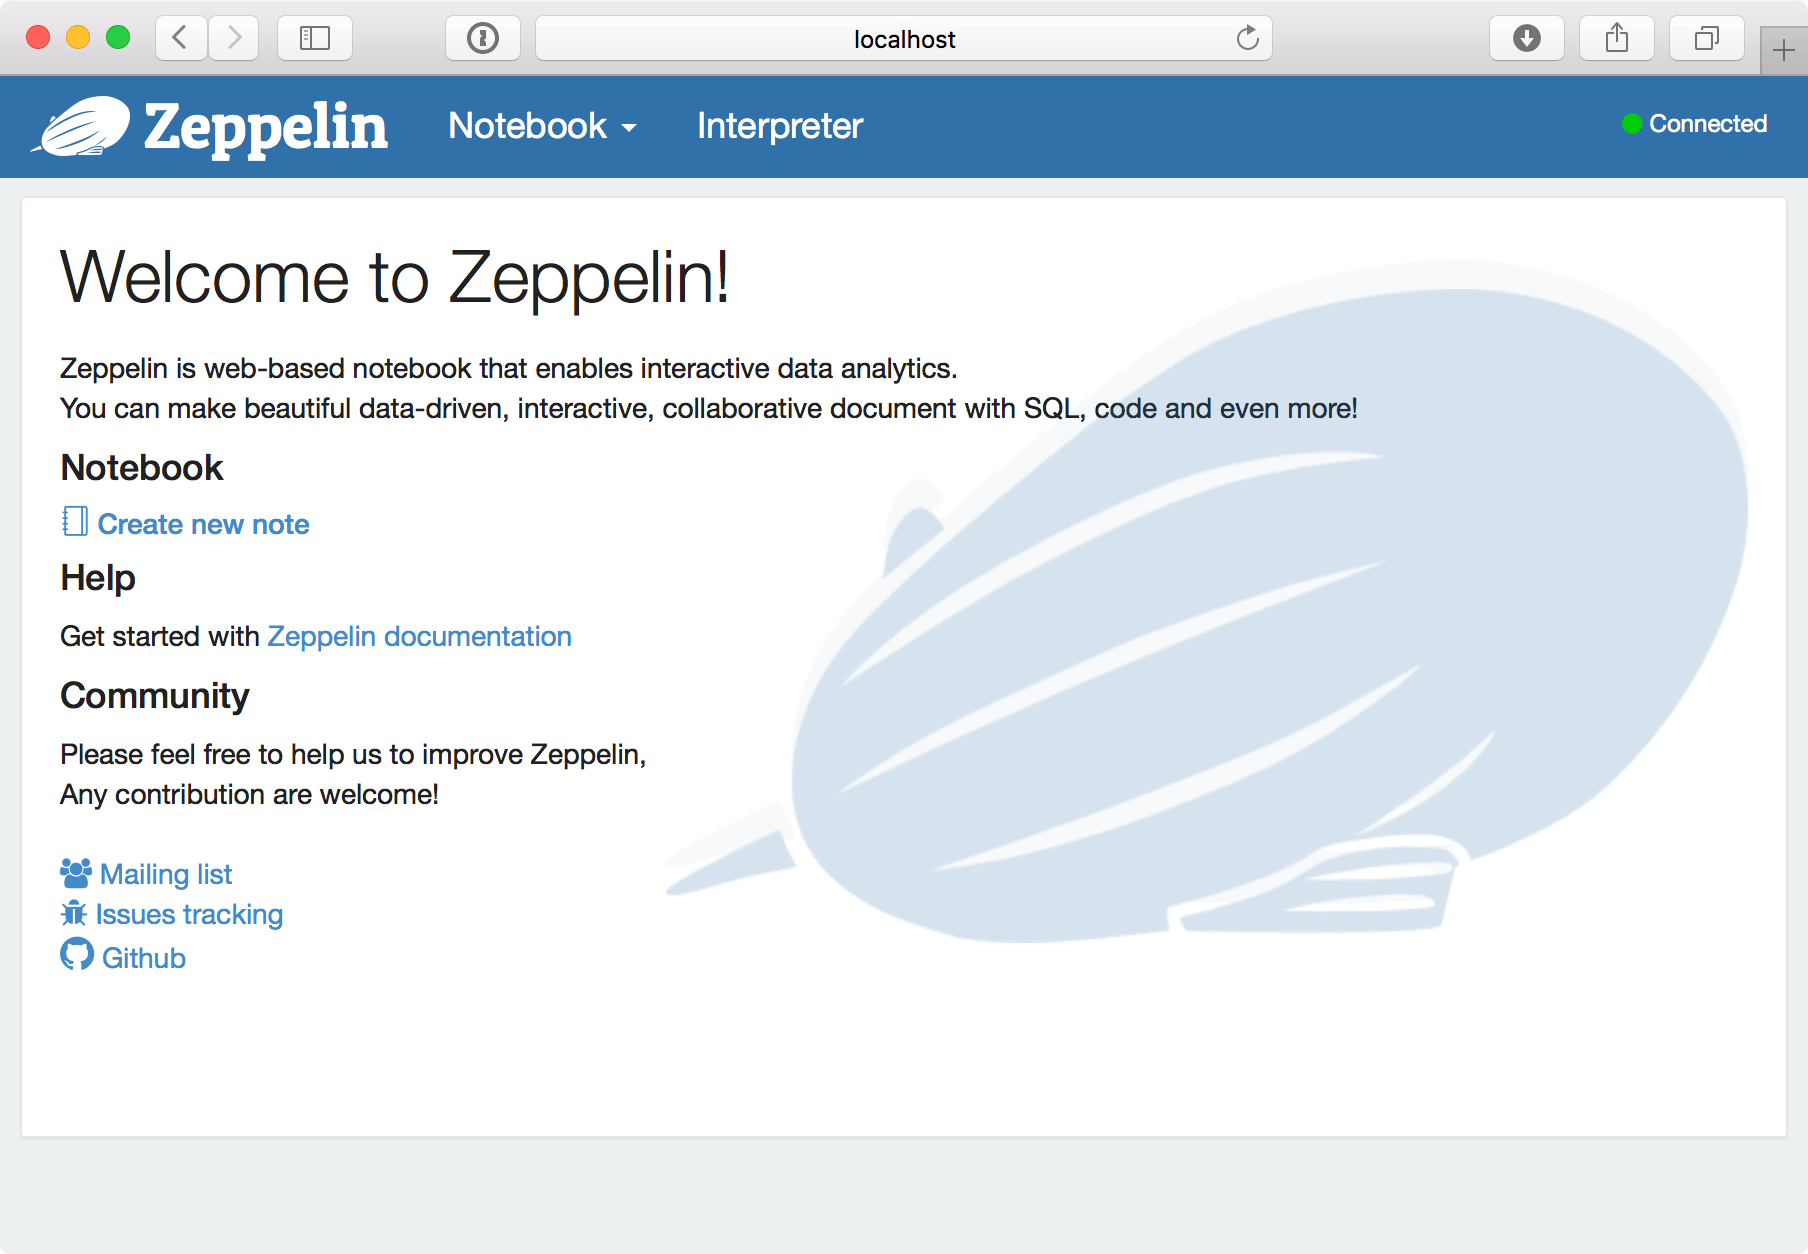
As noted in https://github.com/kubernetes/kubernetes/tree/master/examples/spark “On GKE, kubectl port-forward may not be stable over long periods of time. If you see Zeppelin go into Disconnected state (there will be a red dot on the top right as well), the port-forward probably failed and needs to be restarted.”
To access the notebook externally, the service should be exposed:
kubectl expose rc zeppelin-controller --type="LoadBalancer"Run the following command to find the external IP:
kubectl get services zeppelin-controller
That means that Zeppelin can also be found at http://104.155.67.27:80803
In the next part of this tutorial, we’ll create a GCE persistent disk to persistently store the Zeppelin notebooks we create in this cluster. This requires the creation of a new docker image for Zeppelin and a new yaml file for the Zeppelin controller.
For now, enjoy!